The Illustration Friday prompt this week is: unicorn. In September, I drew a unicorn to illustrate a guest post for Dani Duck's Smart Dummies challenge (a month dedicated to helping illustrators create a picture book dummy).
I'm re-posting this in case anyone is gearing up to create a dummy to start the new year (can't believe it's almost January) or planning to create one before the year ends, and also to show my unicorn drawing for Illustration Friday:
Three Ways To Make A Picture Book Dummy
There are
probably many ways to make a picture book dummy, but I can only think of three.
I gave them nicknames so they’d be easier to remember [also because it made me
laugh]. I’ve actually made dummies using all three ways, though I never know
which one it’s going to be when I start. Every book is different. The important
thing is to start. The picture book dummy will not make itself, no matter how
much you wish it would.
- Note: Making
picture book dummies is a lot harder than it seems like it should be.
I. The Unicorn - unlikely, but possible
I. The Unicorn - unlikely, but possible
* Think up a
great story and/or character idea.
* Draw/imagine
the character(s) and the world of your story.
* Write the manuscript.
- Note: If
someone else wrote the story, re-read it, and move to the next step.
* Make a dummy.
* Yay! You’re
done! You have a dummy!
* Think up a great
story and/or character idea.
- Note: The next
step is also a great place to start.
* Draw/imagine
the character(s) and the world of your story.
- Note: If you
start here, you might want to go with the step above next.
* Write the first
draft of manuscript.
- Note: If
someone else wrote the story, re-read it, and move to the next step.
* Make a rough
sketch dummy [draw stick figures for your characters if you want].
* Research, “how
to draw _______,” so that you can figure out how to draw whatever it is that you
don’t know how to draw in order to make the dummy. Wonder for a second why it
is that you always make a character or story out of something you can’t draw,
then pull a Maurice Sendak and decide not to draw that thing you can’t draw [in
his case, horses]. Instead, draw that thing that you can draw [in his case,
Wild Things].
* Draw/imagine
the character(s) and the world of your story again, now that you are smarter
and no longer drawing that thing you can’t draw.
* Research “plot”
and try to add it to your story. Then channel Yoda and actually add it to your
story. [“Do. Or do not. There is no try.”]
- Note: If
someone else wrote the story, re-read it, and move down two steps.
* Write another
draft of the manuscript, since you now have a shiny new plot to go with those
things you can actually draw. If you still don’t have a plot, repeat the step
above as many times as needed, all while repeatedly shaking your fist at plot.
* Make another
dummy, only this time make sure you have the BIG eraser on standby. Or better
yet, do it in pen so you can’t erase!
* Go to the
library and/or bookstore and get a bunch of picture books. Study how to make a
picture book, from people who know how to write stories with plot and know how
to draw things, like horses and bicycles, or even a horse on a bike. [Realize
that maybe this is how you should have started.]
* Start over.
* Rinse and
repeat as needed until you have a shiny new picture book dummy!
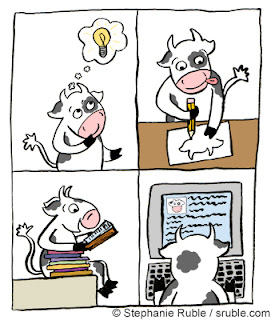
III. Moo Cow - slow and dependable
III. Moo Cow - slow and dependable
* Think up a
story and/or character idea. It should be an idea you like and want to work on.
It should also be something that picture book aged kids like and/or experience.
Don’t worry if it doesn’t seem like a brilliant idea. That’s what revision is
for, to take your idea and make it the best it can be.
- Note: If
someone else wrote the story, re-read it, and move to the next step.
* Noodle ideas/scenes
for the story and how your character(s) and world will look. Have fun and play
with the art and story. Think about “what if” questions and the unusual traits
or looks of your character(s).
* Study picture
books to get inspired and to learn about the craft of writing and illustrating picture
books. Use current ones so that you know what’s working in picture books now.
You can also study older picture books to see what was done in the past, but
remember that the pace and word count of older books is different from what’s
being published now.
* Write a
manuscript using your ideas and what you learned from the steps above. When
you’re satisfied with your story, or just can’t wait to start making the art,
proceed to the next step.
- Note: If
someone else wrote the story, re-read it, and move to the next step.
* Page out the
manuscript. You can do this on the manuscript itself, by drawing small boxes to
represent pages of the story [a.k.a. thumbnails], laying our sheets of paper or
Post-it notes, or making an actual dummy. The important thing is to look at
where the page turns are and whether or not you have enough room to tell the
story, or not enough story for the number of pages.
http://taralazar.com/2009/02/22/picture-book-construction-know-your-layout/
- Note 2: many
picture books are 40 pages these days [Self-Ended], but not all. Some are still
32 pages.
* Start
sketching out the picture book dummy, using your ideas and scenes from the
first two steps above. Give yourself enough time to do this without rushing. It
will take longer than you think, so give yourself a deadline and then double
it. Better yet, triple it so you actually have enough time. Don’t get
frustrated if it takes even longer than that. Some people can do this step
quickly, while others need lots of time to work out the details and get them
right.
* When you’re
done with your dummy, read the whole thing and look at the art while turning
the pages. Reading out loud will help you to catch any mistakes or places where
the wording isn’t as smooth as it could be or doesn’t work with the art.
* Make any necessary
revisions to the text and/or art. Repeat the step above and this one too, until
you’re satisfied with the way the art and text work together to tell the story.
* Choose 2-3 of
your favorite pages/spreads from your dummy and make finished art.
* Put the
sketches and the finished art all together in dummy form [paper or digital -
scan if needed to make digital dummy].
* Congratulations!
You now have a shiny new picture book dummy!
Final Thoughts:
No matter which
of the three ways above you chose to use to create a picture book dummy [or
your own way not listed above], you’re now done! Celebrate! Reward yourself!
Pass out and sleep for a week!
Then forget how
hard it was to make a picture book dummy so you’ll want to do it again next
time!
Good luck!
You can do it!
*waves pom-poms
[actually a pencil and eraser]*
p.s. If you're interested in becoming a picture book illustrator and/or writer, here are some of my past posts that might help:
The Path Illustrators Take To Get Their Work Noticed And Advance Their Careers
Five Tips For Illustrators
The Importance Of Making Art For Fun
Ten Tips For Choosing What To Draw For Your Portfolio, And Ten Ways To Find Inspiration
How To Write A Picture Book In Twelve Easy Steps
If You Just Want To Illustrate And Not Write
p.p.s. If you're planning on creating a dummy, check out all the great posts for Smart Dummies. So much wonderful and helpful information!
p.p.p.s. If you like my unicorn and want it on something fun like a t-shirt, it's up on my cafepress store and also over at my zazzle store.


No comments:
Post a Comment